A Wood Hat?
 Posted On
It was November 2009 and I was attending my turning guild meeting. I was unaware of who was demonstrating but was surprised to see a table full of hats.
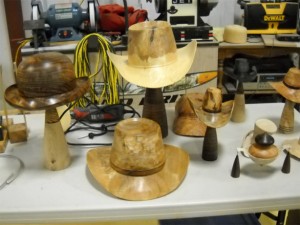
Some were small some were full sized and some were almost thimbles (micro hats). But most interesting was they were all made out of wood. Once the meeting started we were introduced to Johannes Michelsen who has been making hats out of wood for many. His adroit presentation combined technique, skills, and how-to; all while turning a 100 lb block into a 7 oz hat in a few short hours.
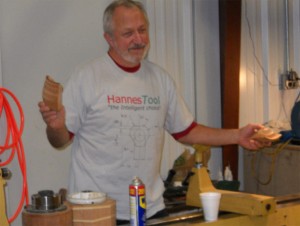
After that demonstration I was amazed at the concept and wanted to learn more. I had never taken a turning class but figured this would be a great first.
Last week we drove up to beautiful Manchester Center Vermont to the Michelson School of Turning. There Andrew and I took Johannes 3 day hat turning class while Sue explored the area.
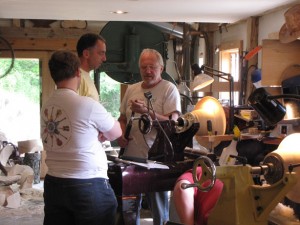
Day 1: We met Peter who lived an hour away and was also enrolled in the class. Johannes demonstrated the entire process making his hat in about 3 hours.

After lunch we each picked out our log and Johannes cut it on his industrial sized band saw. (so big it takes a couple of minutes to get up to speed)

We mounted our block on the lathe and began rough tuning the blank. The wood was fresh-cut and so wet it was spitting at us as it turned. We couldn’t turn it too far or it would crack overnight. We burried the hat in the wet shavings on the floor.

Day 2: We dove right in and took the rough turned blank through the prescribed process starting with the under/outer brim curve. We measured our heads to get the correct size for the inside diameter. Then reversing the hat we started shaping the outer cone to the proper size making sure to include the swell and the bulge and to leave a little thickness for the band. Finally we shaped the brim of the hat.

Reversing the hat once more we began to work on the underside/inside of the hat. Using the light as a thickness guide the brim is shaped.

Then we continued with the inside all the way to the crown. Some sanding was done before removing the faceplate.
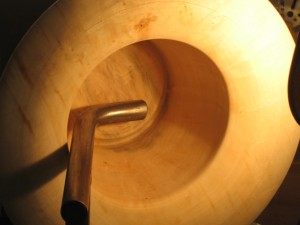
Next we install the hat on a special chuck with a light in it and finish the hat to the same thickness.

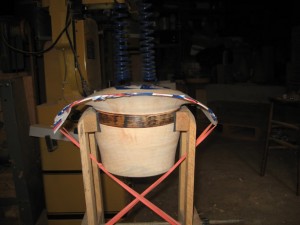
Finally the hat is placed in a bender.
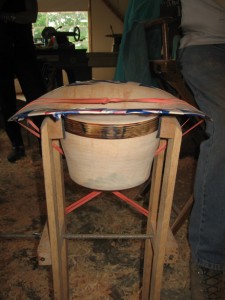
And over the next 20 hours the brim bends significantly.
Day 3: Johannes showed up how to turn mini hats. The process is almost identical to the full sized hats but we reviewed the process first. Johannes took a 6 in block of wood and turned a mini hat in a little over 20 minutes. This also served as a reminder of the process for the big hats reinforcing what we had learned the two days before. I was able make two mini hats (and lost two trying – but the goal was practice)

I am not sure if I can adequately put into words the things I came away with from this master turner with a calm demeanor and a patient spirit. I feel privileged to have studied at the feet of such a master.


Chris G.
That’s awesome guys! Looks like you had a great time! 🙂
Dave Hickman
Thanks! Yes we had a super time and learned tons.
JoHannes Michelsen
Hi Dave, Thanx so much for your kind summation of the hats workshop process and for helping to spread the word!
Deb and I very much enjoyed your company for the weekend and appreciated the joy you and Andrew took from it.
Happy Turning, joHat
Tagg A. Timm
Dave,
Great step by step of your turning. I thoroughly enjoyed the detail in your story, and the pictures were great. Glad you had a good time, and I’d like to see your hat sometime.
Tagg
Victor Wanveer
I was at Johanne’s wood turning class several years ago and have just purchased a large lathe to start turning hats and other stuff. I am looking very forward to finally applying some of that knowledge and and my owe spice to this wonderful art of hat turning. I’m Looking forward to making alot of shavings.
Victor
Dave Hickman
Victor: So glad your going to put it to use! I too just purchased a larger lathe. I dont know how many hats I will turn but hope to make some. If your near NW Virginia I would love to compare notes on hat turning.
Mike Kachmar
Where or who did you purchase your rubber bands from for bending your cowboy hats.
Thank you, Mike
Mark Seiler
What size lathe is needed to turn cowboy hats?